If you’re experiencing issues with your Samsung Galaxy A34 smartphone or simply want to start fresh, performing a reset can help resolve various problems. Here’s a step-by-step guide on how to reset your Samsung Galaxy A34.
1. Backup your data: Before proceeding with a reset, it’s important to back up any important data on your device. This includes photos, videos, contacts, and any other files you don’t want to lose. You can use Samsung’s Smart Switch app or manually transfer your data to a computer or cloud storage.
2. Access the Settings menu: Open the Settings app on your Samsung Galaxy A34. You can find it by swiping down from the top of the screen and tapping the gear icon or by locating the app in your app drawer.
3. Navigate to the General Management section: Scroll down and tap on “General Management” in the Settings menu.
4. Select Reset: Within the General Management section, tap on “Reset” to access the reset options.

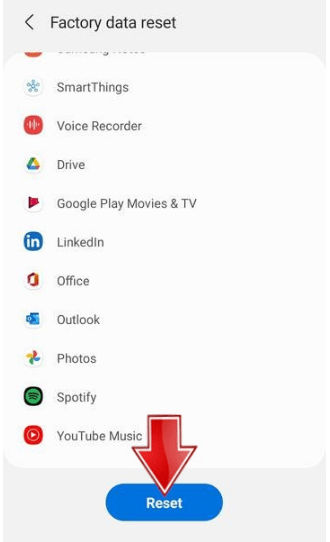
5. Choose Factory Data Reset: Tap on “Factory Data Reset” to initiate the reset process.
6. Confirm the reset: Read the information provided and tap on “Reset” or “Delete All” to confirm the reset. This action will erase all data on your device, including apps, settings, and personal files.
7. Wait for the reset to complete: Your Samsung Galaxy A34 will now begin the reset process. This may take a few minutes, and your device will restart once the process is complete.
8. Set up your device: After the reset, you’ll need to go through the initial setup process again. Follow the on-screen instructions to set up your Samsung Galaxy A34, including signing in with your Google account and restoring any backed-up data.
Remember, performing a factory reset will erase all data on your Samsung Galaxy A34, so it’s important to back up your data beforehand. Resetting your device can help resolve software issues and restore it to its original state.
