Windows 11 is the latest operating system from Microsoft, offering a range of new features and improvements. One exciting addition is the ability to install and run Android apps directly on your Windows 11 PC. This integration opens up a whole new world of possibilities, allowing you to enjoy your favorite mobile apps on a larger screen and with the convenience of a keyboard and mouse. In this guide, we’ll walk you through the steps to install and run Android apps on Windows 11.
Step 1: Check System Requirements:
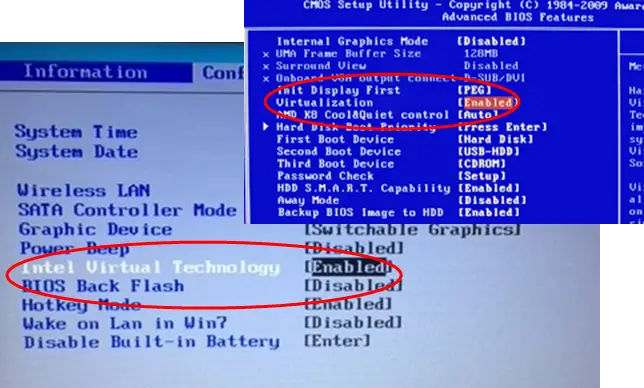
Before you begin, make sure your PC meets the minimum system requirements for running Android apps on Windows 11. You’ll need a compatible PC with at least 8GB of RAM, a 64-bit processor, and Windows 11 installed. Additionally, your PC must support virtualization, and virtualization must be enabled in your BIOS settings. You can usually access the BIOS settings by pressing a specific key during startup, such as F2 or Delete.
Step 2: Enable the Windows Subsystem for Android:
To enable the Windows Subsystem for Android, go to the Windows Settings app by clicking on the Start button and selecting the gear icon. In the Settings app, click on “Apps” and then select “Apps & features” from the left-hand menu. Scroll down and click on “Optional features.” Next, click on “Add a feature” and search for “Windows Subsystem for Android.” Select it and click on the “Install” button. Follow the on-screen instructions to complete the installation.
Step 3: Sign in to Your Microsoft Account:
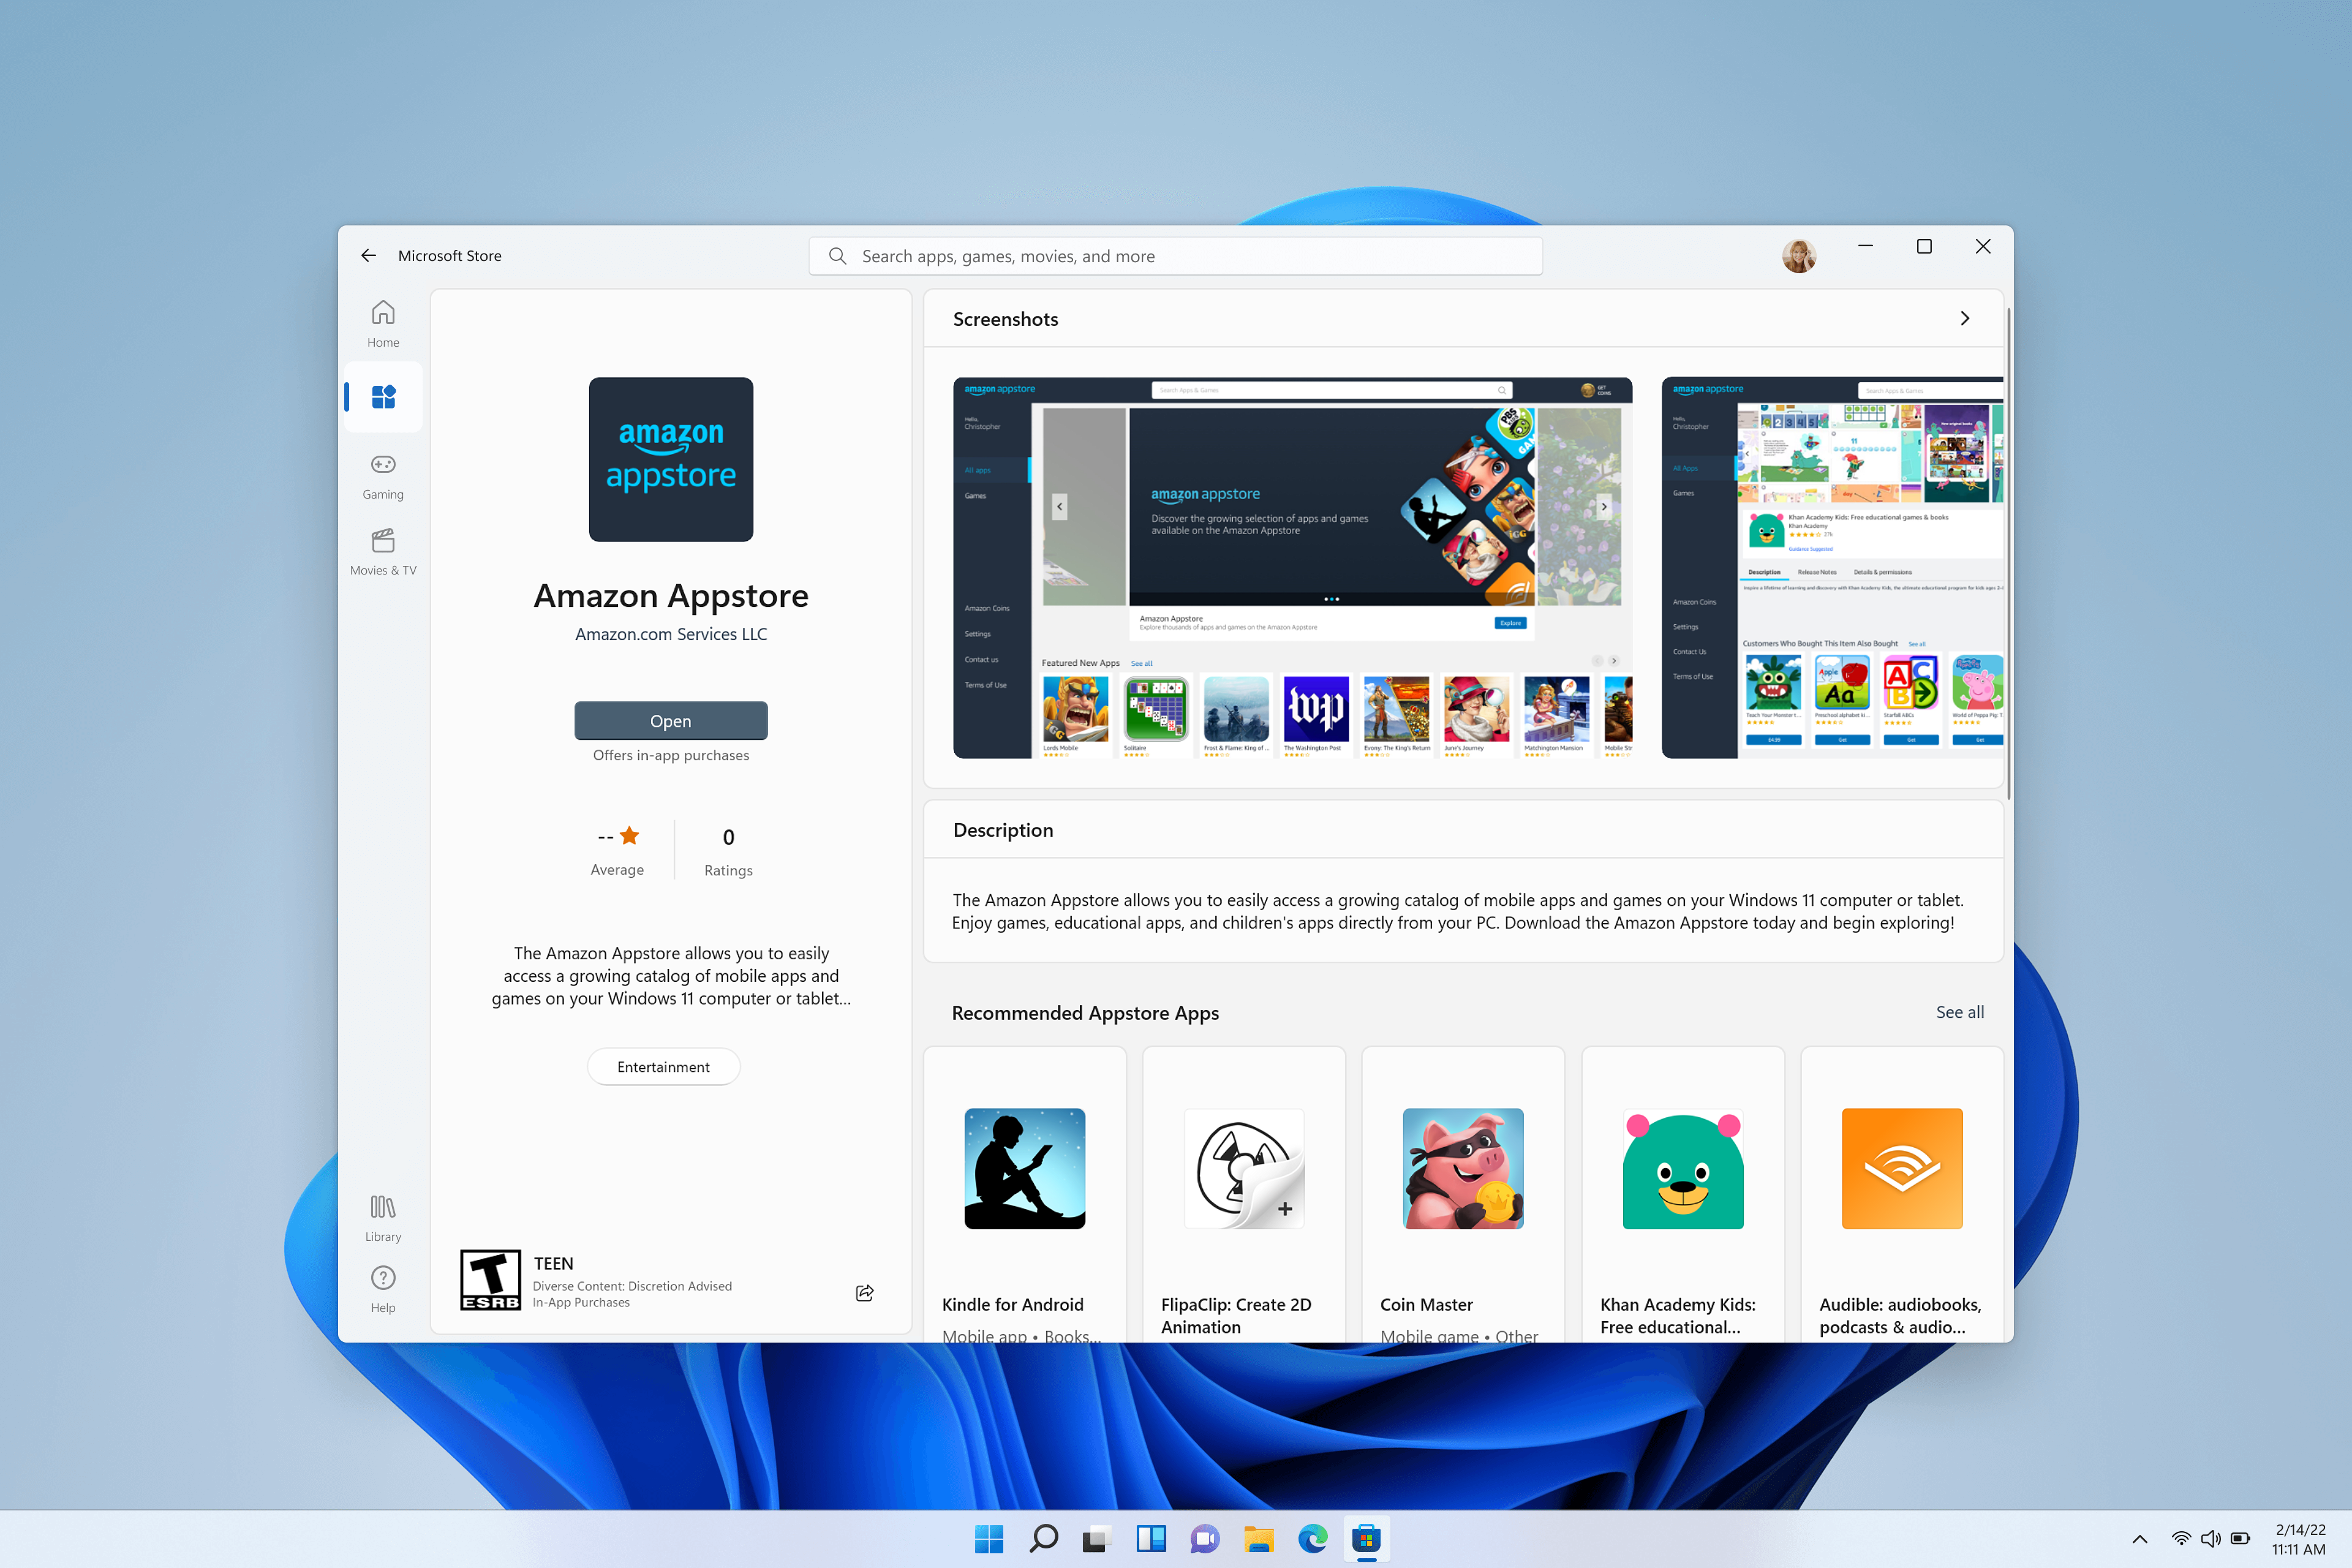
To access the Microsoft Store and download Android apps, you’ll need to sign in to your Microsoft account. If you don’t have one, you can create a new account for free. Once you’re signed in, open the Microsoft Store app on your Windows 11 PC.
Step 4: Download and Install Android Apps:
In the Microsoft Store, search for the Android app you want to install. You can browse through various categories or use the search bar to find specific apps. Once you’ve found the app you want, click on it to open the app page. Click on the “Get” or “Install” button to begin the download and installation process. The app will be installed on your PC and will appear in the Start menu or on the taskbar.
Step 5: Launch and Use Android Apps:
To launch an installed Android app, simply click on its icon in the Start menu or on the taskbar. The app will open in a window on your Windows 11 PC, allowing you to interact with it using your keyboard and mouse. You can resize the app window, maximize it, or minimize it, just like any other Windows application. Some apps may require additional permissions or settings adjustments to function properly, so make sure to follow any on-screen instructions.
Step 6: Uninstall Android Apps:
If you decide to remove an installed Android app from your Windows 11 PC, you can do so easily. Right-click on the app icon in the Start menu or on the taskbar and select “Uninstall” from the context menu. Alternatively, you can go to the Windows Settings app, click on “Apps,” select the app you want to uninstall, and click on the “Uninstall” button.
Conclusion:
With the integration of Android apps on Windows 11, Microsoft has made it easier than ever to enjoy your favorite mobile apps on a larger screen. By following the steps outlined in this guide, you can install and run Android apps on your Windows 11 PC in no time. Whether you want to play games, use productivity apps, or access social media, the possibilities are endless. So go ahead, explore the Microsoft Store, and start enjoying the best of both worlds on your Windows 11 PC.