In this article, we will explore various methods on how to take screenshot in laptop on different operating systems, with a focus on Windows 10, Windows 11, and more.
Taking Screenshots on Windows 10
Windows 10 offers several built-in options for capturing screenshots. Here are three commonly used methods:
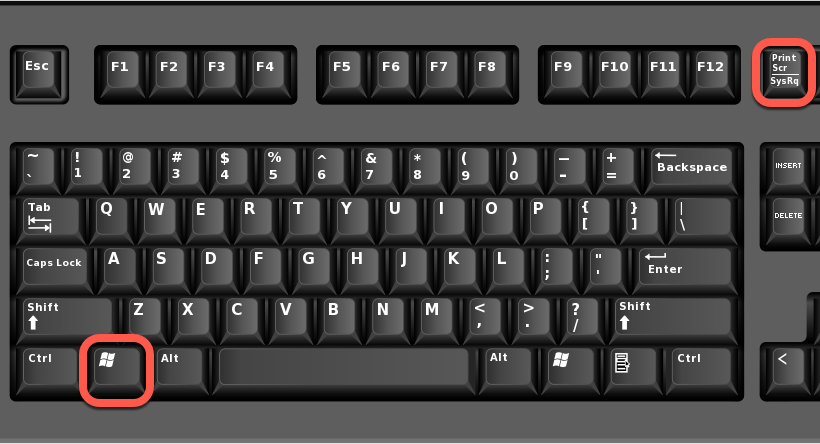
Method 1: Using the Print Screen (PrtScn) Key
The Print Screen key is a quick and convenient way to capture the entire screen. Simply press the PrtScn key on your keyboard. The screenshot will be copied to your clipboard. You can then paste it into an image editing program, such as Paint, and save it.
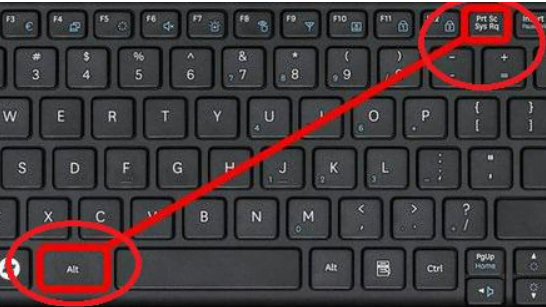
Method 2: Capturing a Specific Window
If you want to capture a specific window rather than the entire screen, use the Alt + PrtScn key combination. This will capture the active window and save it to your clipboard. Again, you can paste it into an image editing program to save it as an image file.
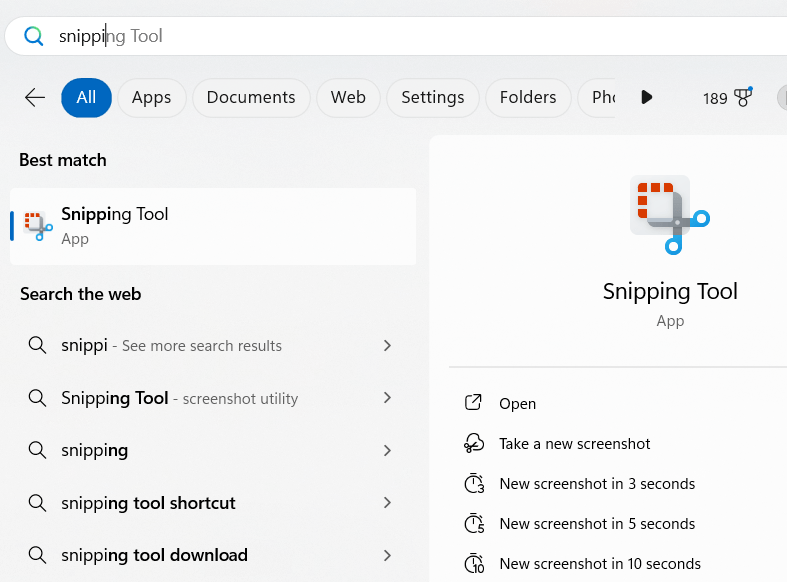
Method 3: Snipping Tool
Windows 10 also provides a built-in Snipping Tool that allows you to capture specific areas of the screen. To access it, search for “Snipping Tool” in the Start menu. Once opened, click on “New” and select the area you want to capture. You can then save the snip as an image file.
How to take screenshot in laptop on Windows 11?
Windows 11 introduces some new features and changes to the screenshot capturing process. Here are a few methods you can use:
Method 1: Using the Print Screen (PrtScn) Key
Similar to Windows 10, pressing the PrtScn key captures the entire screen and saves it to the clipboard. You can then paste it into an image editing program to save it as an image file.
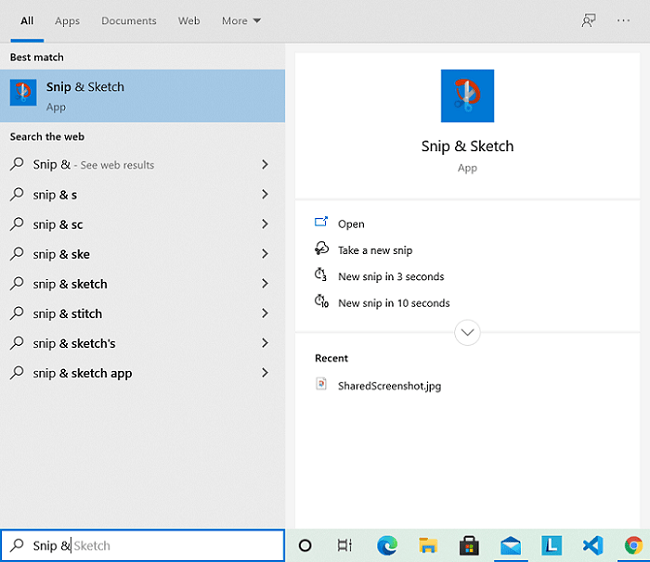
Method 2: Using the Snip & Sketch Tool
Windows 11 comes with the Snip & Sketch tool, which combines the functionalities of the Snipping Tool and Sketchpad. To access it, press the Windows key + Shift + S. This will bring up a toolbar at the top of the screen, allowing you to capture a specific area, a window, or the entire screen. After capturing the screenshot, you can make annotations and save it as an image file.
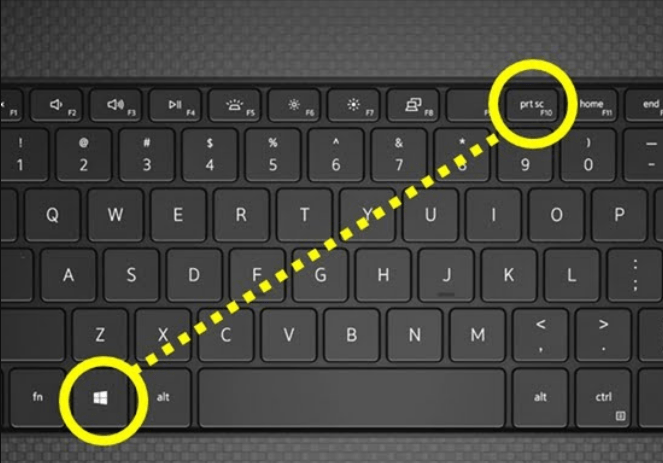
Method 3: Using the Windows + Print Screen (Win + PrtScn) Key
In Windows 11, you can also use the Windows + PrtScn key combination to capture the entire screen and automatically save it as an image file in the Screenshots folder.
Additional Options for Taking Screenshots
In addition to the built-in methods, there are third-party applications available that offer more advanced screenshot capturing options. Some popular options include:
- Snagit: Snagit is a powerful screenshot and screen recording software that allows you to capture screenshots, record videos, and edit them with various tools.
- Lightshot: Lightshot is a lightweight and easy-to-use screenshot tool that offers features like capturing specific areas, adding annotations, and directly sharing screenshots online.
- Greenshot: Greenshot is an open-source screenshot tool that provides a range of capture options, including capturing specific areas, windows, or the entire screen. It also offers basic editing features.
These third-party applications can enhance your screenshot capturing experience with additional features and customization options.
Taking Screenshots on Windows Laptops (10 & 11)
| Method | Shortcut | Description |
|---|---|---|
| Print Screen Key | PrtScn | Captures the entire screen and copies it to the clipboard. |
| Windows Key + Print Screen | Win + PrtScn | Captures the entire screen and saves it as a PNG image in the “Pictures” > “Screenshots” folder. |
| Snipping Tool | Win + Shift + S | Opens the Snipping Tool for selecting specific areas, windows, or the entire screen. Offers options for freehand, rectangular, window, or full-screen capture. Saves the screenshot to the clipboard or a chosen location. |
| Game Bar (Windows 10) | Win + G | Opens the Game Bar for capturing screenshots and recording gameplay. Click on the “Screenshot” icon within the Game Bar to capture the entire screen. |
| Xbox Game Bar (Windows 11) | Win + G | Opens the Xbox Game Bar, similar to the Game Bar in Windows 10. Click on the “Screenshot” icon to capture the screen. |
Additional Notes:
- In some laptops, the PrtScn key might be combined with another function key (Fn). Pressing Fn + PrtScn will activate the Print Screen functionality.
- Windows 11 offers a new keyboard shortcut, Win + Alt + PrtScn, which captures the active window and automatically saves it to the “Pictures” > “Screenshots” folder.
- The Snipping Tool and Xbox Game Bar offer additional features like annotations and editing tools, allowing you to modify the captured screenshot before saving or sharing.
I hope this table helps!
Read more on how to take Screenshot on Windows 10?
Commonly asked questions:
1. What happens when I press the PrtScn key alone?
Pressing PrtScn alone captures the entire screen but doesn’t save it as an image file. Instead, it copies the screenshot to the clipboard. You’ll need to paste it into an image editing software like Paint or an application like Word to save it as an image.
2. How do I find the screenshots saved by the “Windows Key + Print Screen” shortcut?
These screenshots are saved as PNG images in the “Pictures” folder with a subfolder named “Screenshots”.
3. Can I customize the location where screenshots are saved?
Unfortunately, the “Windows Key + Print Screen” shortcut saves screenshots to a default location. However, you can use the Snipping Tool or Xbox Game Bar to choose a specific location for saving your screenshots.
4. What’s the difference between the Game Bar and Xbox Game Bar?
Both tools allow you to capture screenshots, but the Xbox Game Bar (Windows 11) offers additional features specifically designed for gamers, such as recording gameplay footage and broadcasting live streams.
5. How can I edit my screenshots?
You can use various image editing software like Paint, GIMP (free and open-source), or Photoshop to edit your screenshots. Additionally, the Snipping Tool and Xbox Game Bar offer basic editing tools like cropping and drawing annotations directly on the captured image.
I hope this Q&A section provides additional clarity and answers any potential questions you might have about taking screenshots on your Windows laptop.
Conclusion
Taking screenshots on your laptop is a valuable skill that can come in handy in various situations. Whether you’re using Windows 10, Windows 11, or even third-party applications, the methods outlined in this article should help you capture and save screenshots effortlessly. Experiment with different options and find the method that works best for you. Happy reading!